Introduction
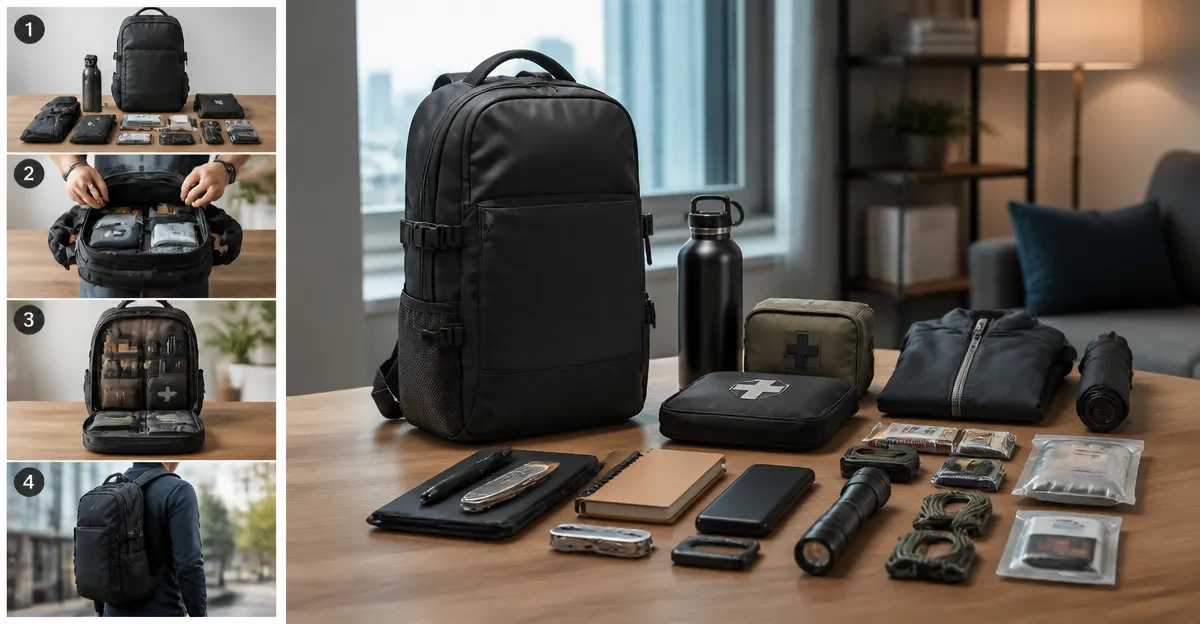
One will discover how to assemble a compact yet comprehensive bug‑out bag that fits within the limited storage space of a typical apartment. The guide explains the rationale behind each component, demonstrates efficient packing methods, and highlights products that simplify the process. Readers will gain confidence to create a discreet emergency kit that can be deployed quickly in a crisis. The information remains valuable even if one chooses not to purchase any of the suggested items.
What You Will Need
- A concealable backpack with sufficient capacity and durable construction.
- A personal water filtration device capable of removing bacteria, parasites, and microplastics.
- An emergency food supply that offers a long shelf life and easy preparation.
- A lightweight shelter solution that protects against rain, wind, and sun.
- Basic first‑aid items, a multi‑tool, and a means of lighting.
All of the primary items are available on Amazon and are linked at their first mention.
Step 1: Choose a Concealable Backpack
One should begin by selecting a backpack that blends with everyday urban attire while providing enough volume for essential gear. The Sandpiper Bugout Backpack offers a 45‑liter capacity, carry‑on compatibility, and multiple zippered compartments that aid in organization. Priced at $124.34 with a 4.7‑star rating from 695 reviews, it is praised for durability and the ability to hold a week’s worth of clothing and equipment. Its professional‑grade construction includes reinforced stitching, a breathable back panel, and a modular design that supports both travel and tactical use. For those who prefer a lower price point, the LHI Tactical Backpack 45L costs $27.99, carries a 4.7‑star rating from 1,138 reviews, and features a MOLLE system for attaching additional pouches. The backpack’s heavy‑duty zippers, padded straps, and compression system ensure comfort during extended wear while remaining discreet enough for everyday commuting.
Step 2: Integrate a Reliable Water Filtration System
Access to safe drinking water is a non‑negotiable priority in any emergency scenario, and one must therefore include a filtration device that does not rely on bulky containers. The LifeStraw Personal Water Filter costs $14.99, holds a 4.8‑star rating from 125,473 reviews, and removes 99.999999 % of bacteria and 99.999 % of parasites while reducing turbidity to 0.2 microns. Its ultralight straw design allows the user to drink directly from natural water sources or to filter water into a container for later consumption. The filter’s lifespan of up to 4,000 liters (approximately five years of regular use) eliminates the need for frequent replacements, making it an economical choice for apartment preppers who may store the device in a kitchen drawer or a bathroom cabinet. Compared with conventional pump filters, the LifeStraw requires no power, no moving parts, and no additional chemicals, thereby reducing the risk of failure during a power outage.
Step 3: Pack an Emergency Food Supply
One must include a food source that requires minimal preparation, offers balanced nutrition, and remains edible for decades. The ReadyWise 7‑Day Emergency Food Kit is priced at $55.99, carries a 4.6‑star rating from 280 reviews, and provides 60 servings of freeze‑dried meals with a shelf life of up to 25 years. Each meal only requires the addition of hot water, which can be heated using a portable stove, a campfire, or even a kettle in a kitchen. The kit’s adjustable strap allows it to be attached to the exterior of the chosen backpack, freeing internal space for other essentials. In comparison with canned goods, the ReadyWise meals are lighter, do not rust, and are less likely to attract pests, making them ideal for concealed storage in a small apartment.
Step 4: Add a Versatile Shelter Solution
Protection from the elements is essential when evacuating the apartment and spending time outdoors, and a compact tarp can serve multiple functions. The Vital Gear Camping Tarp costs $34.99 and is rated 4.7 stars (based on user feedback). Its heavy‑duty, weather‑resistant material can be rigged as a lean‑to, an A‑frame, or a flat canopy, providing shelter for one person or a small group. Reinforced grommets and multiple tie‑down points enable rapid setup using paracord or zip‑ties that are commonly stored in a tactical backpack. Because the tarp folds into a compact stuff sack, it occupies minimal space and can be concealed within the main compartment of the Sandpiper or LHI backpack. Compared with a full‑size tent, the tarp reduces weight, bulk, and the visual profile of the bug‑out bag, which is advantageous for discreet transportation.
Step 5: Include Essential Tools and Personal Protection
One should allocate a dedicated pocket for a multi‑tool, a compact first‑aid kit, a flashlight, and a whistle. These items do not require specific Amazon recommendations in this guide because they are widely available and can be selected based on personal preference. The multi‑tool provides cutting, gripping, and fastening capabilities that complement the backpack’s MOLLE system. A lightweight LED flashlight with a long‑lasting battery ensures visibility during night‑time evacuations, while a whistle serves as an audible distress signal. All of these tools should be positioned in exterior zippered compartments for rapid access without exposing the entire bag.
Step 6: Organize for Quick Access and Concealment
One must arrange the contents of the backpack so that the most frequently used items are reachable without fully opening the bag. Place the LifeStraw in an external mesh pocket near the top of the backpack, allowing immediate use when a water source is encountered. Store the ReadyWise food kit in a side compartment that can be detached and carried separately if the bag becomes too heavy. The Vital Gear tarp should be rolled tightly and secured with the built‑in straps, then positioned at the bottom of the main compartment to act as a protective base layer. Use compression straps on the LHI or Sandpiper backpack to flatten the load, reducing the bag’s silhouette and making it easier to slip under a bed or into a closet. Finally, label each compartment with a waterproof marker to facilitate rapid identification during high‑stress situations.
Tips & Pro Tips
- Rotate the water filter and food supply every 12‑18 months to maintain freshness and performance.
- Practice setting up the tarp in a controlled environment before an emergency occurs; muscle memory reduces setup time.
- Store the backpack in a location that is both hidden from casual visitors and easily reachable, such as behind a piece of furniture.
- Consider adding a small solar charger to keep a phone or LED light operational without relying on batteries.
- Periodically check all zippers, straps, and buckles for wear; replace any compromised components before they fail in a crisis.
Troubleshooting
Problem: The LifeStraw flow rate slows after filtering several liters of water.
Solution: Flush the filter with clean water for 30 seconds, then tap the straw gently to dislodge trapped particles. If the issue persists, replace the filter after its rated 4,000‑liter lifespan.
Problem: The tarp tears at a grommet during high wind conditions.
Solution: Reinforce the grommet with a piece of duct tape or a metal eyelet before deployment. Ensure that tie‑down lines are tensioned evenly to distribute wind load.
Conclusion
One now possesses a clear, actionable plan for constructing a concealable bug‑out bag that meets the unique constraints of apartment living. By selecting a discreet yet durable backpack, integrating a proven water filter, securing long‑lasting emergency food, and adding a lightweight tarp, the prepared individual can respond swiftly to any disruption. The guide emphasizes organization, regular maintenance, and practice, ensuring that the bag remains ready for immediate deployment. Armed with this knowledge, one can achieve peace of mind while maintaining a low profile in an urban environment.
Products Mentioned in This Guide
Frequently Asked Questions
What size and features should a concealable backpack have for an apartment bug‑out bag?
Choose a backpack that fits under a bed or in a closet, offers 20‑30 L capacity, has durable, water‑resistant material, and hidden compartments for discretion.
Which type of personal water filter is best for a compact emergency kit?
A lightweight, squeeze‑style filter that removes bacteria, parasites, and microplastics without needing batteries is ideal for a small bug‑out bag.
What emergency food items provide long shelf life and easy preparation?
High‑calorie freeze‑dried meals, energy bars, and MREs that require only hot water are space‑efficient and stay edible for years.
How can I pack a lightweight shelter that protects against rain, wind, and sun?
A compact, waterproof tarp or a single‑person bivy with a built‑in rainfly folds into a small pouch and offers full weather protection.
What essential first‑aid and multi‑tool items should I include in a concealable bug‑out bag?
Include a compact first‑aid kit (bandages, antiseptic wipes, pain relievers), a multitool with knife, pliers, and screwdriver, and a small LED flashlight or headlamp.